January 27, 2014

Bright and Pink Big Girl Room Reveal


Transitioning from a toddler bed to a full size bed this past summer was the starting point for designing this bright and colorful "big girl" room for our three, now almost four year old daughter. She loves bright colors, especially pink, and I like the light and airy feeling of the white trim and furniture. It was also important that we design a space with styles mature enough to last into her early elementary years but still fun and youthful enough to reflect her vibrant preschool age personality.

Another priority when creating this space was to incorporate toy storage into the room's design. With baby #2 on the way, the former playroom has now been designated for the baby's nursery and while our daughter's bedroom used to be mostly toy-free, it was now necessary to have a space for her toys. This cube storage system (Target) works great. The canvas bins on the bottom row are especially great for keeping all those small toys and toy pieces together and organized.


Does anyone recognize the flannel throw blanket at the foot of her bed? Its the faux chenille applique blanket I made and shared on this blog a few years ago. She still loves it and has held up surprisingly well (considering it was one of my very first sewing projects) through many washings. For more photos and a tutorial on faux chenille applique, click HERE for the original blog post about that blanket.


Across from the bed is a chest of drawers with vanity mirror (Nebraska Furniture Mart). The top of the dresser houses our daughter's favorite element of the room (and my favorite too :-), the pink and purple lava lamp (Target).


Project Details:
Chest of drawers with vanity mirror- Nebraska Furniture Mart
Bright pink curtains- Hobby Lobby
Green and pink LOVE wall art- Hobby Lobby
Lime green wooden tree- Hobby Lobby
Pink and purple lava lamp- Target

Pink minky swirl pillowcase (square pillow) - made by me similar to THIS tutorial. 
Fabric pennant banner or name bunting- made by me click HERE for more details
Flannel star blanket with faux chenille applique- made by me. Details shared HERE.


Thanks for stopping by!
The Bean Sprout Notes

Sharing at some of these great blog parties

January 18, 2014

Fabric Name Banner or Bunting for a Big Girl Room

Follow my blog with Bloglovin


During my blogging break last summer, I completed a lot of DIY crafts but have only blogged about a few of them. This personalized fabric name banner (or is it called a bunting?) was made when my daughter transitioned into her big girl bed last year.

To begin this project, I chose a white mid-weight linen and actually cut two layers of fabric for each of the banner's triangle. I did this because I wanted the weight of each triangle to be fairly substantial and avoid edge curling.

The next step was to make bias tape out of fat quarters for the trim work around each triangle. This is pretty easy and you can easily google instructions for DIY bias tape, but basically, you cut a long strip of fabric - I believe mine was 2" wide - press in half lengthwise, and then press in half lengthwise again. Sew around the triangle's two long edges.

The name letters were also cut from fat quarters. This was before I owned a cutting machine so I hand traced the letters from a computer printout.  I backed the pink fabric with Heat and Bond Ultra iron transfer and simply ironed each letter onto a pennant.


The final step was to assemble the banner. I used store bought bias tape for this step (the darker pink "string" running along the top) which I sewed onto the top of each triangle. The edges of the each triangle intentionally overlap to prevent buckling, as this was a fairly large project.

I used a clear 3M command hook to attach to wall.


Thanks for reading!

Pin It

January 14, 2014

Boy or Girl? Our Gender Reveal

One of the perks to volunteering at a pregnancy center is that I have access to ultrasound equipment, and because sonography was my professional background before having kids, I was able to preform a quick ultrasound on myself early in the pregnancy and reveal baby's gender well before my official 20 week anatomy scan with my OB.

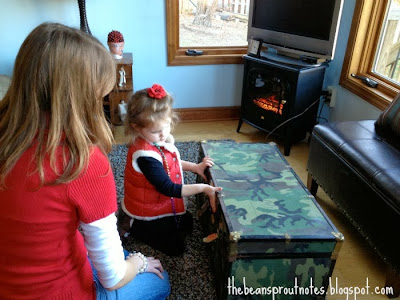
Our family wasn't aware that we already knew baby's sex, so a little impromptu gender reveal on Thanksgiving Day was a fun surprise. We wanted to include our daughter in the announcement, so to reveal baby's gender, we let our three year old open an old vintage trunk which we had decorated inside with lighted tulle garland, Christmas lights, and a pennant banner. (The tulle Christmas light garland is the same one I wrote about HERE)
Pin It

Our three year old is so excited to be a big sister, and she is even more excited that her new sibling is little sister instead of a brother. She really wants to name the baby "January" but mom and dad have other names in mind :-) 


January 3, 2014

Lookie What I Made: DIY Maternity Jeans


When you're 5'10" finding jeans with a long inseam is almost always a challenge. A challenge that becomes nearly impossible when shopping for maternity jeans. Very few places carry tall maternity jeans without ordering online or paying a ridiculous price. So what's a crafty girl to do? DIY of course!

My sewing skills are elementary at best, but even I was able to pull off this project with the modified help from this tutorial by Running With Scissors. 

The best part is, it didn't cost me a thing! Both the jeans and the swimsuit coverup, from which I cut the elastic band, were clothing items in my "donate pile." Other than a small hole in the knee, the jeans were in good condition (and long enough :)


Obviously, I don't normally tuck my shirts into maternity jeans, so normally the pink band is completely covered by the length of my maternity shirts. 

And while I was at my sewing machine, I took the opportunity to patch the knee hole that landed the jeans in the donate pile in the first place. I'm usually not one to patch knee holes, especially with such a bold color, but I think the pink is kind of fun :)