
Much of my spring cleaning this year was centered on large project in the back yard. By suburban standards, we have a spacious lawn with mature trees. The large lot and mature backyard were key selling points for us when we purchased our home several years ago. Yet today, we seldom venture off the deck and the majority of the yard is significantly underused.
My goal was to build an inviting backyard area (other than the deck) that we could enjoy all year long. An outdoor area where we could play on even the hottest of summer days. And I am proud to say I successfully built just that. I am absolutely thrilled with how this project turned out, but in order to really appreciate the transformation, you must first look at what I started with.
 |
| Early spring, before the tree leafed out |

(Totally off topic, but did you know that PicMonkey now offers collage features!! Hooray!)
Before I started...
- I raked up the residual leaves that had fallen this spring. (Did you know that some varieties of Oak trees hold onto their leaves until late February or March?)
- Clean and reposisiton the skeleton hammock frame.
- Laid out the garden hose to envision my design and measure amount of edging length to buy.
- Dug out any grass growing within my border (there wasn't much)
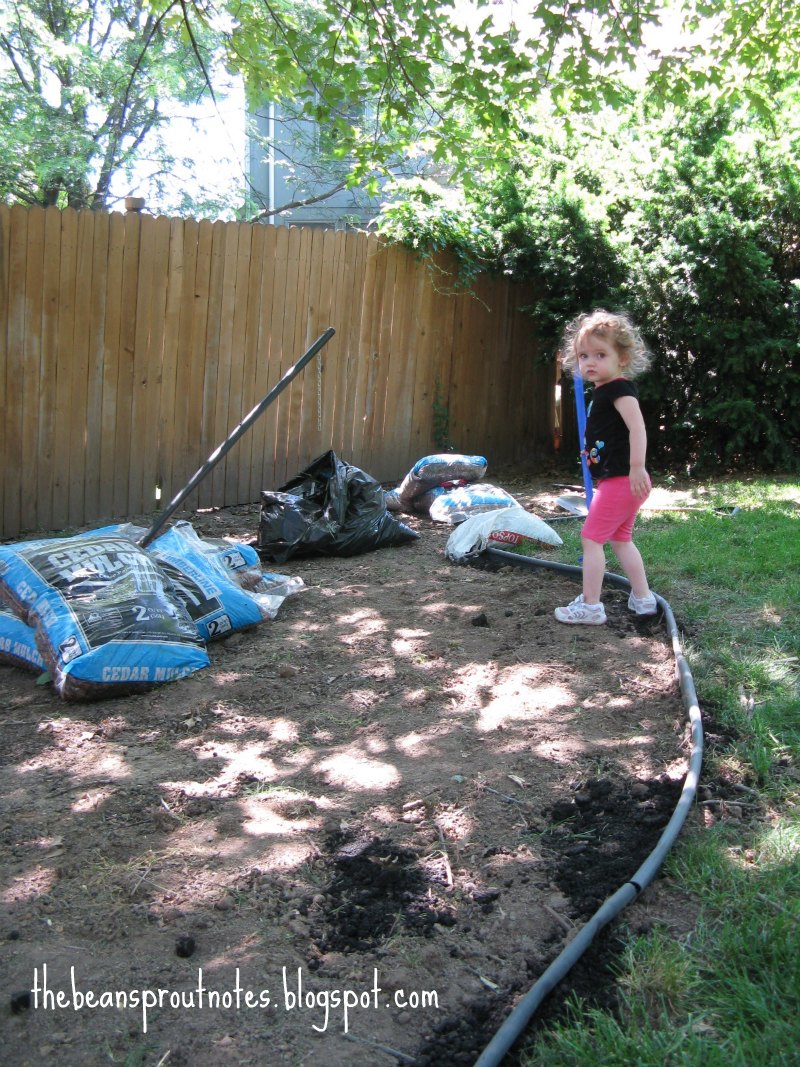 |
| My little helper |
Then I got to work...
- Digging a trench to bury the edging.
- Placing the edging and securing with metal stakes into the ground.
- Back fill the edging with dirt.
- Transplant a few hostas from another location to help with slope erosion.
- Replace broken hammock
- Move baby swing from another location.
- Placed a large square paving stone as a chalk board.


I absolutely love how this turned out!! My kind husband helped haul the bags of mulch out of the car for me, but other than that I was able to do this all on my own. And I am super proud with the results. This project has literally changed the way I live. We are out in the yard all the time now.

The driveway is in full sun most of the day. This paver stone is the perfect chalk solution under the tree's shade.
Now excuse me while I go read in my hammock before the Bean Sprout wakes up from her nap :)
Mischele
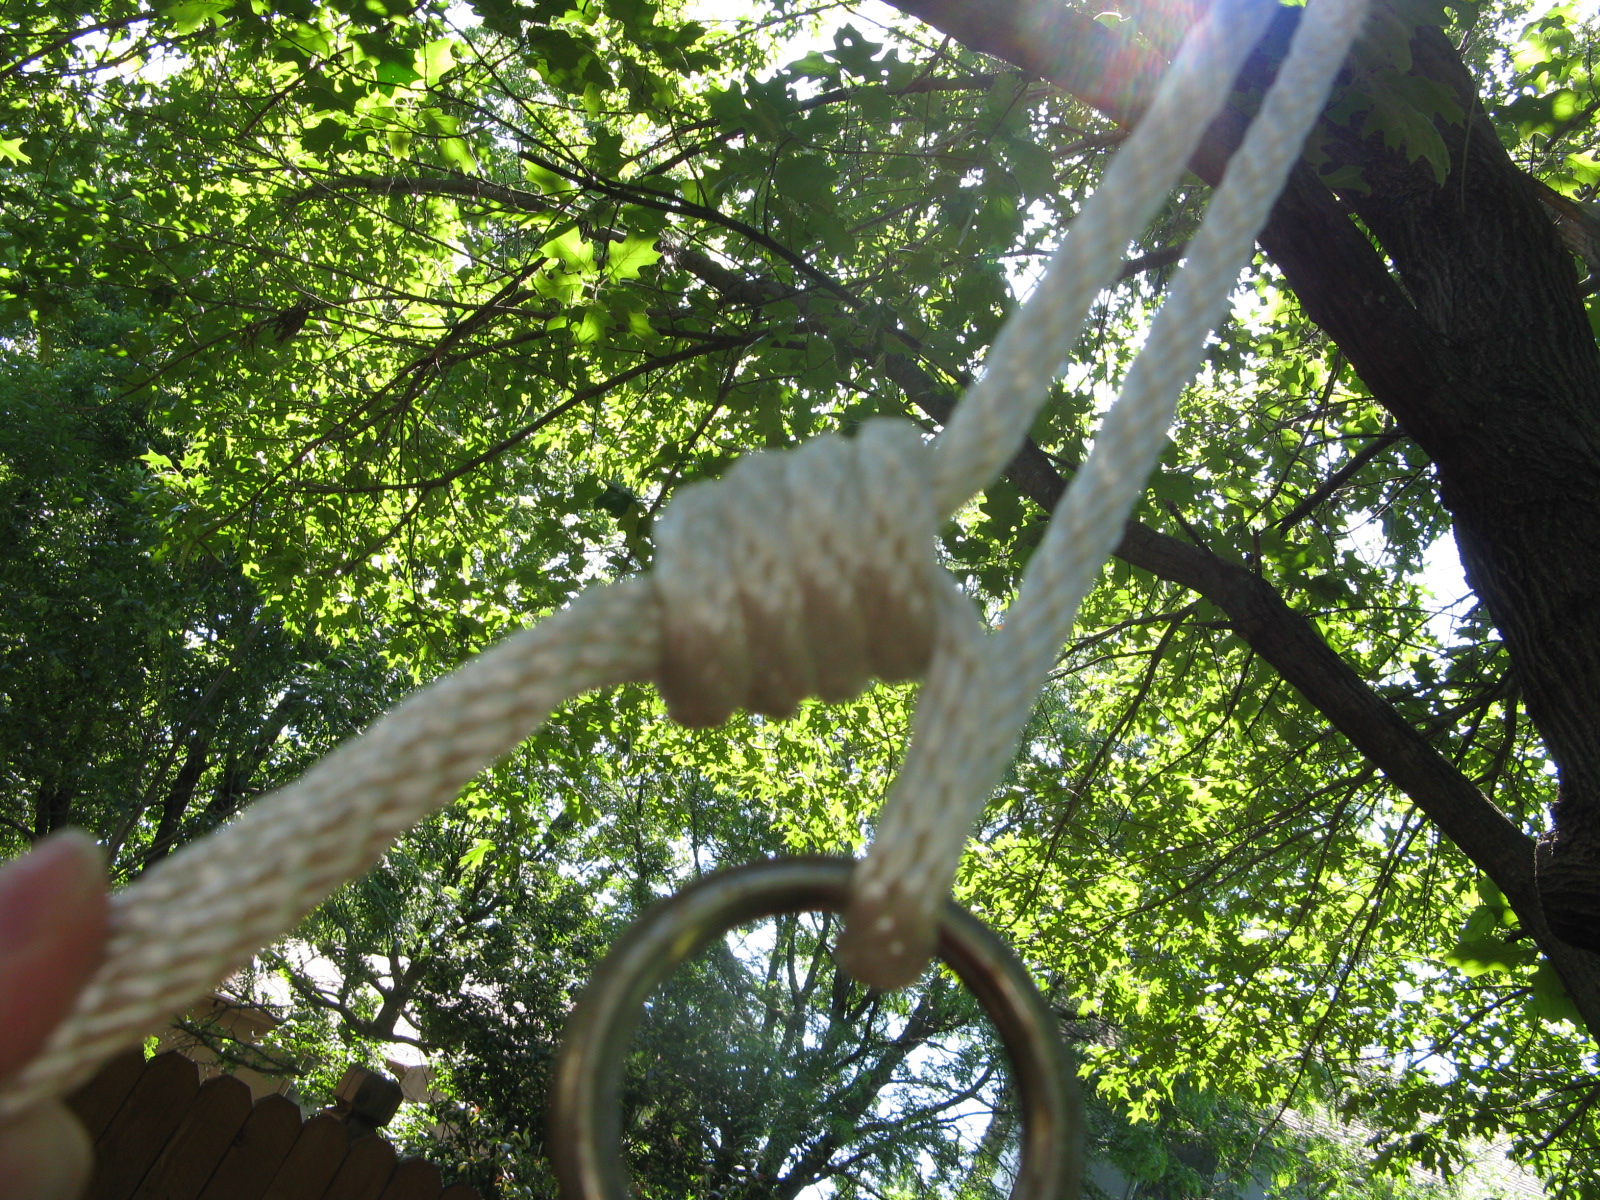
Note to self: the perfect tree swing knot looks like this. (fold up, around, around, and down in the hole)
Shelby, all I can say is "You Rock!!!!" Very creative and a wonderful idea!! You are a
ReplyDelete#1 Mom!!!
Awesome! Looks like your hard work paid off! Thanks for linking to Things I've Done Thursday!
ReplyDeleteGirl...that was a LOT of work, but sooooo worth it!! LOVELY!! Now go enjoy it! Thank you for linking up to Uncommon! :)
ReplyDeleteGreat job!
ReplyDelete