Thank you Fly Through Our Window for introducing me to the idea of using wire to secure the bow's center. I've made numerous bows before, and this wire method is by far the simplest. And if you're
Click on over to view her full tutorial, or follow along with my modified version described below.
Suggested Ribbon Sizes/Lengths
Regular size bow: 7/8" grosgrain ribbon cut 18" long (with 1/4" ribbon, 2" long for center)
Small bows: 5/8" grosgrain ribbon cut 12" long (with 1/8" ribbon, 2" long for center)
Extra Large bows: 1 1/2" grosgrain ribbon cut 36" long (with 1/4" ribbon, 2" long for center)
Step One: Cut ribbon on diagonal and gently heat sear both cut edges of ribbon by holding near a flame.
Step Two: Fold ribbon as shown.
Step Three: Fold up and down over the back side as shown.
Step Four: Fold up and tuck tail under the top ribbon.
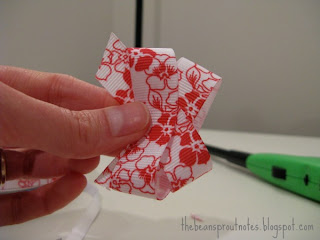
Step Five: Pinch ribbon forming two peaks as shown.
Step Six: Use a small piece of wire (or half a bread tie) to twist securely around center of bow. Set aside.
Step Seven: For the center, I took a two inch piece of coordinating ribbon and tied a very loose knot and hot glued around the twist tie in the center. You may need to trim to precise length before glueing. Don't forget to flame sear this piece of ribbon too!


LOVE! I had no idea making a bow could be so easy.
ReplyDeleteWhat a clever way to make hair bows!! And so pretty too!
ReplyDeleteThanks for sharing at Monday Funday Link Party!
Hope your week is extraordinary!